Tuesday, October 29, 2013

Paupiettes de veau (stuffed veal cutlets)

Another day, another French classic recipe.

Today, I present you with Paupiettes de veau. They are little parcels made of veal cutlets, stuffed with ground pork, veal and herbs. Paupiettes are one of my absolute favorite dishes, and I have such fond memories of my grandmother cooking them for us during our vacations. In France, they can be found ready made at the butcher's, however you really cannot find them outside of France. So I decided to make my own. They are very easy to prepare and delicious!

Try them! They will satisfy your taste buds and impress your guests ;)


INGREDIENTS (makes about 8 Paupiettes):
for the stuffing:
- 1lb boneless pork shoulder
- 1lb cubed veal shoulder
- 1/2 cup bread crumbs (I used Panko)
- 1 large onion and 2 cloves of garlic, finely diced
- 2 eggs
- 1 tbsp fresh parsley, chopped
- a few sprigs of fresh thyme (dried is fine too)
- 2 tbsp butter
other ingredients:
- 8 large thinly sliced veal cutlets (if they are small, buy more and you can piece them up to make them larger)
- 1/2 cup sour cream
- 1/2 cup white wine (I used pinot grigio)
- 1x 8oz cremini mushrooms


RECIPE:
- working in batches, grind the pork and veal shoulder meat with a food processor (or if you're lucky enough to have one, a meat grinder). DO NOT GRIND THE CUTLETS.

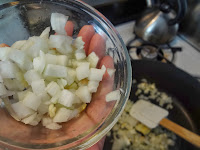
- reserve 1/4 of raw onion/garlic for later use. In a small skillet, melt half of the butter and saute about 3/4 of the onion/garlic mix until soft -not brown- over medium heat,.eserve for later.

- in a large bowl, combine the ground meat and the rest of the stuffing ingredients and mix well

- lay the cutlets flat on a clean surface and put a small handful of stuffing inside. Roll the cutlet around the stuffing and secure the parcels with cooking twine

- in a dutch oven, melt the remaining butter over medium-high heat, brown the Paupiettes on all sides and reserve in a plate

- saute the remaining onion/garlic mix in the same pan until soft, over medium heat. They will release moisture and that will deglaze the drippings from the pan. After 2 minutes, add teh sliced mushrooms and cook over medium-high heat until golden

- place the Paupiettes back on top of the mushrooms, add the wine and cook covered over medium-high heat for about 20 minutes

- after 20 minutes, remove the lid add the sour cream and cook for another 5 to 10 minutes, until thickened

- serve with white rice, a lot of sauce and a nice glass of white wine. You can also serve them with peas or green beans.

- Bon appetit!

Sunday, October 27, 2013

Roasted eggplant and tomato soup

This is the perfect soup.

Simple, fast, easy on the wallet, low fat and delicious. What else do you want? Now get in your kitchen and go make this!!

Best enjoyed on a cold night, while wearing cozy pyjamas and couch-potating (yes, that's a word!) Crosswords optionnal.

Note: this soup was not designed as a vegetarian recipe but can easily be adapted to a vegetarian/vegan diet.


INGREDIENTS (4 people or 2 people with leftovers; 1hr cooking time):
- 3 medium eggplants
- about 3lbs tomatoes
- 1 medium onion, peeled
- 2 large cloves of garlic, peeled
- about 1 tbsp tomato paste
- a sprig of thyme
- 4 cups of beef broth
- 2 salted anchovies in oil
- a splash of olive oil
Vegetarian option: switch to vegetable broth and omit the anchovies


RECIPE:
- preheat your oven at 425F
- cut the eggplants in half lengthwise, sprinkle with olive oil and place cut side down in an oven-safe dish. Oil the garlic cloves, wrap in aluminium foil and place next to the eggplants

- place in the pre-heated oven and roast for about 45 minutes until golden.
- while the eggplants are roasting (about 10 minutes in), heat a little olive oil in a deep pot and melt the anchovies over medium heat. Add the sliced onion and thyme and cook for a few minutes; add the tomato paste and cook another 2 to 3 minutes until soft

- add the quartered tomatoes, the broth and bring to a boil

- cook for 15-20 minutes or until the tomatoes are soft. The garlic and eggplants should now look like this:


- tell me that isn't the most scrumptious thing you've ever seen! I dare ya!
- scrape out the eggplant flesh, and reserve in a bowl with the roasted garlic until ready to use


- when the tomatoes are soft, add the eggplant and garlic and cook for another 5 minutes

- turn off the heat and blend the soup until smooth (I used a stick blender)

- serve with a slice of crusty sourdough bread (can you tell I love sourdough?!), or a grilled cheese sandwich for a fancy complete meal :)

- Enjoy!

Friday, October 25, 2013

Leftover Pot Roast: express Shepherd's pie

So you made Pot Roast and have been eating leftovers for a few days? Worry no more! Here is a super simple recipe that will get rid of those last bits and pieces that don't even constitute a full meal anymore! 

A couple of weeks ago, I prepared a Pot-au-feu (the French equivalent of Pot Roast), and had some to eat at lunch and dinner for the next four days. On day number 5, I was so sick of it I knew I just had to end it and make those leftovers vanish!

I whipped up this express Sheperd's pie in exactly 5 minutes and heated it up in the microwave for 3 minutes. Dinner ready in 8 minutes? Yes, please!

INGREDIENTS:
- pot roast leftovers (veggies, meat, broth)
- tomato paste
- optional: grated cheese if you want to fancy it up and brown the dish under a broiler

RECIPE:
- put the cooked meat in a bowl and pull apart with two forks (or your hands), add a squeeze of tomato paste (about 1 tbsp) and some broth. Mix it well; you want the meat to be moist, not soupy
- mash the remaining veggies (in my case carrots, turnips and potatoes) and pour over the meat, directly in the bowl
- heat it through for a few minutes and enjoy your express dinner!
Note: if you want, you can do this in a small oven-safe dish, grate some cheese (mozzarella, Parmesan, cheddar, whichever you like, really!) and broil in a preheated oven.

Monday, October 21, 2013

Homemade butter

I don't know how to convey the pleasure you will have making your own, fresh butter...

First of all, it's FUN! Well, I guess if you're as much of a cooking dork as I am. Second, it tastes orders of magnitude better than the cheapo butter you can find in supermarkets.

It has a very distinct creamy flavor and you can really play with the intensity by varying the number of washing steps to remove the buttermilk from the fresh butter. Also depending on the cream you purchase to make your butter, you will have a different taste in your final product.

One of the most important things to remember when you are making your own butter though is to use a cream with a HIGH fat content. Low fat, half-n-half, light cream are no-go. In stead, use heavy cream, whipping cream, creme fraiche and although I haven't tried yet,  I'm sure it'd work with sour cream too. I'll try and let you know soon! And if you have tried with sour cream, please leave me a comment and let me know how it turned out!


INGREDIENTS:
- heavy cream, cold
- an electric beater (I used my stand mixer, but a large bowl and a hand electric mixer work fine; Elbow grease works too if you feel like an extended upper body work out :) )


RECIPE:
- put the cold cream in a large bowl and beat until whipped cream (Chantilly) consistency

- when you reach soft peaks, continue to beat vigorously until it becomes a bit grainier

- and then beat some more! the cream will become yellower and wetter: the buttermilk has then started to separate from the butter itself. When you hear sloshing noises (or can see a puddle of liquid), you are done beating

- transfer the butter and buttermilk to a mason jar (or any container with a lid - a tupperware will work too), close the lid and shake, shake, shake! This will finish to separate the butter and buttermilk

- transfer the buttermilk to another container (you can use this in pancakes, cupcakes, or any recipe that calls for milk/buttermilk) and rinse the butter with ice-cold water until the water is clear (use the same shaking method)

Note: cold is important, because you want to keep the butter cold
- at this stage, your butter is ready. Since it is rather soft, you can flavor your butter now with fresh herbs, spices, or just plain salt like I did. Mix well and transfer butter into your serving dish

Note: you can also roll the butter into a log, wrap it into saran wrap and refrigerate (this will make it easier to cut into slices later)
- This butter is delicious on fresh or grilled bread and can be used for cooking and baking.

- Enjoy!